Projection Solutions on the U.S.S. Stargazer
The original television show, Star Trek debuted 56 years ago on Sept. 8, 1966. Fifty six years later—and numerous incarnations on both the small and big screen—the universe created by Gene Roddenberry continues to fascinate and engage fans with new stories. Most recently, Paramount+ network’s Star Trek: Picard, follows the adventures of the beloved captain, Jean-Luc Picard, years after Star Trek: The Next Generation. For Picard, the producers wanted to maintain a visual continuity to the earlier series, yet also show that Starfleet’s technology had evolved over the intervening years. There is no better place to see this evident than with the distinctive Star Trek Universe’s “LCARS” (Library Computer Access Retrieval System) control panel graphic style on the ship’s bridge.
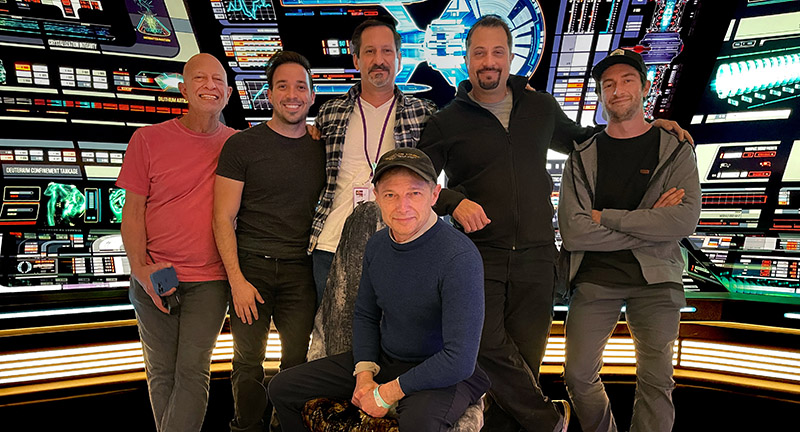
To create the futuristic command consoles and computer screens on the bridge of the Federation Constellation class starship, the U.S.S. Stargazer, for seasons two and three, the production brought in Todd A. Marks, principal of Images On Screen to serve as Computer Playback Supervisor. Marks and his team specialize in providing computer/video playback and projection solutions for film and television production. Having worked on over 50 feature films, including 2002’s Star Trek: Nemesis, Marks brought back some old tricks, as well as some new, updated techniques, and paired with high resolution projection solutions from Epson, to find the ideal solution for Star Trek: Picard.

Screen Management
“As computer playback supervisor on the show, my job was to manage and oversee all the on-set playback as well as the creation of the content for that playback,” explains Marks. “I worked closely with Twisted Media, the company who created the playback graphics, plus my team of experienced video engineers who had many years of history working on Star Trek, as well as a projection engineer.” Marks worked jointly with the show’s set designers and art directors, together figuring out how they were going to represent the different types of display technologies. “They would draw things up and I would say, ‘Okay, well, here’s a way we could do that. Or, what if we did this instead?’,” says Marks. “I try to bring the creative design into the practical world and then also show them some of the newer technologies that we can then incorporate into consoles and other things like that. We spent months and months designing and refining; and finding solutions that would work for our needs.”
Throughout season two of Star Trek: Picard, Marks and his team noted the benefit of having real-time projection on the show. Among the many challenges was that the graphics in every episode could change drastically, but Marks wasn’t daunted, noting that, “the projectors allowed for seamless content adjustments and were compact and light, making it easy to shift them to accommodate our needs while filming. As Captain Jean-Luc Picard so wisely once said, ‘there is a way out of every box, a solution to every puzzle; it’s just a matter of finding it,’ and Epson projectors were our solution.”
They were also cost-effective, “Unlike some other film and TV shows using expensive and significantly more complex LED walls, projectors allowed us to create the visuals we wanted for a fraction of the price,” comments Marks. Also using Garage Cube’s MadMapper projection mapping software to playback and change effects in real-time, Images On Screen could map out the visuals Twisted Media created and react quickly to adjust for changing hero shots and background effects. Marks comments, “The use of practical projection playback dramatically minimized the need to use more expensive post-production effects in many situations during production.”
Hugging the Curve
The consoles on the bridge went through a variety of design iterations. What initially was going to be monitors used to create the side consoles became an innovative curved-screen concept using projection. Marks explains, “The original concept was to do one continuous curved screen going from upright and then doing a curve down to the front console. We ordered a large sample piece of FlexGlass®, a flexible AR rear screen material from Screen Innovations, to build a test unit that we could adjust the screen’s position and angles to determine what worked best. The first tests were actually beautiful, other than the bottom portion of the screen—the “ship’s controls” part—where we found that any projection of fine detail through the FlexGlass was not very sharp because it is going through a curved piece of acrylic. While the top section worked well on camera, the bottom section needed to be sharper so that production could film close-ups of the actors’ hands interacting with the controls of the ship. We tried a variety of techniques, yet couldn’t get the images sharp enough. We used MadMapper to pixel shift, adjust and skew the images, but it didn’t fix the issue to our satisfaction. So, we came up with a hybrid solution. For the top part of the screen we used a rear projection technique to project onto the curved FlexGlass and the bottom section was made with four OLED screens and some backlit transparencies on the outside edges. The bottom section was covered with special cut dual AR glass. We then color matched all the images so that it looked like one cohesive display.”
Marks, a fan of rear projection and the advantages of projectors over other visual display mediums, had previously used Epson’s family of ultra-short-throw projectors and digital signage solutions to create effects. He reached out to the Epson product management team who pointed him in the direction of the company’s high lumen Pro Series laser projectors.
“The high lumen Epson projectors were the perfect fit for the complex effects we needed to create,” says Marks. “We had access to their built-in tools like edge blending, and the projectors have a uniform chassis across different lumen outputs with a range of lens options for tricky positioning and angles. Plus, the support from Epson was invaluable for the success of this project with the team providing quick attention to our needs when we asked for assistance. One of the Epson tech support people even flew out to work with us when we first installed the projectors and helped with aligning and adjusting. He helped figure out issues we were having, which was a tremendous help. Epson even at one point sent our measurements and photos to their engineers who calculated the angles and positioning for mounting the projectors and the correct lenses we would need for our tight throw distances. That’s pretty invaluable to be able to get directly from the engineering staff the precise visioning and placement.”
Working in Tight Confines
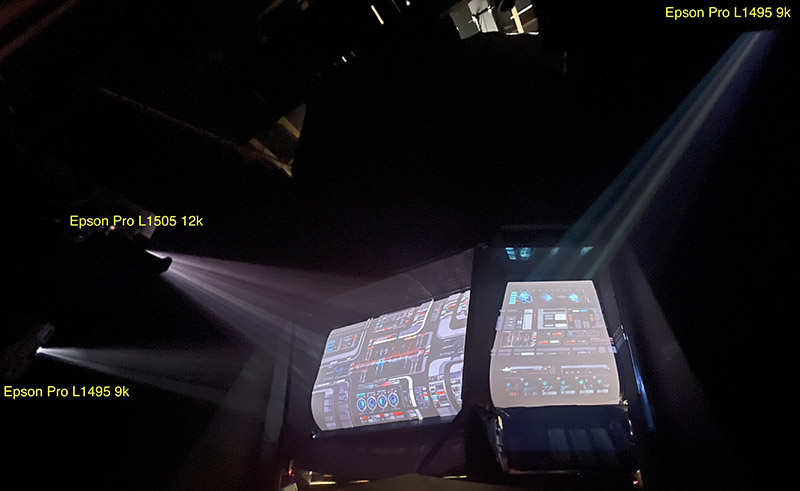
As Marks has noted, the sound stage was packed tight with limited space for projector throw distance, leaving Marks’ team with a restricted area to work within. Still, when building out the projection solution for the command deck of the U.S.S. Stargazer, Images On Screen had to ensure that the bridge was decked out with the complicated moving visuals to show off the ship’s support stations and master systems displays. “We ran into a lot of different technical challenges that we had to overcome in order to make it look really, really good,” says Marks. “The first limitation that we had was the width of our soundstage, which was not terribly wide, and the diameter of the ship actually took up a good portion of the stage. One side had to have the ship’s corridor running along the length of the stage, so we also lost use of that space. Then on the other side of the set, there was maybe 12’ to the wall. That wasn’t a lot of space to work with but it was all the space we had.”
Marks continues, “With projecting on a double-curved surface, we needed a large depth of field. Typically for a large depth of field, you need to have a long lens; you need to be far away. We didn’t have that space and we had multiple complex curves that we had to fit the image onto and adjust for the craziness of the shape. That was part of why we chose Epson projectors—in this case their Pro Series 12K and 9K projectors—they allowed us to use a relatively small projector that had a variety of lenses that we could choose from. And they’re laser projection, which we wanted for the brightness, but also for not having the light change over time. And because they were all the same chassis size, it gave us some backup. So, if, for example, something went down, we knew that we could always swap one of our other units. We knew that all the lenses would fit every single projector we had, and the same size unit could go in for another one. Also, knowing that if we found out that the screen where the 9K is, isn’t bright enough, in a pinch, we could swap out one of our others, as we also had in the back of the ship some Pro Series 15K laser projectors. Luckily, we didn’t need to swap anything around but it gave me a little safety, because on set, if something goes down we need to have that kind of redundancy built in.”
Another factor was that the laser 3LCD projectors helped with filming. With DLP projectors, you sometimes have to change the refresh rate in order to not to have pulsing or other weird artifacts appear on the screen. “The 3LCD projectors don’t have that issue. 3LCD is an ideal technology for on-camera use,” states Marks. “The quietness of the projectors was also an advantageous feature. Being that we were so close to the stage, we were initially concerned we were going to have to build baffle boxes, like you would for a normal 30K projector, however, sound was never an issue with these Epson projectors, which was a huge benefit. We also knew that there was going to be fog, atmospherics used at all times and we were concerned about the projectors sucking in that stuff, so we had all kinds of contingency plans. It is not really the ideal situation to have your projectors sucking in fog juice, but they worked great and we only changed filters one time in our entire nine-month production run.”

Projecting the Stars
In addition to supplying the display screens for the bridge of the U.S.S. Stargazer, the Images On Stage team also provided a rear projection solution for the expanse of stars outside the observation lounge. “For the windows in the observation lounge, we had a 45’ Peroni RNO – Notturno rear projection screen paired with triple-stacked 15K Epson Pro L1700-Series projectors with their 03 [short throw] lenses,” describes Marks. “Because we again didn’t have a lot of space—about 30’ from the back wall to the screen, we worked with Epson on the right lens for this application. We were going to go with edge-to-edge blending originally, but they advised us that if we used this lens in a triple-stack arrangement then we wouldn’t have to blend areas, which we were not looking forward to doing. Just working with alignment was a lot easier to deal with, so that was another great solution.”
Marks was able to create the illusion seeing the back of the ship and the stars through the windows at the back of the bridge. This allowed the production team to shoot without having to worry about an expensive post-production process. “They could just shoot all different angles and not think about it,” explains Marks. “By shooting the stars in-camera, with my projection mapping tools, using MadMapper, I could move the stars. If the ship was diving, I could move the projection, so it looked like we actually were moving.”
Make It So
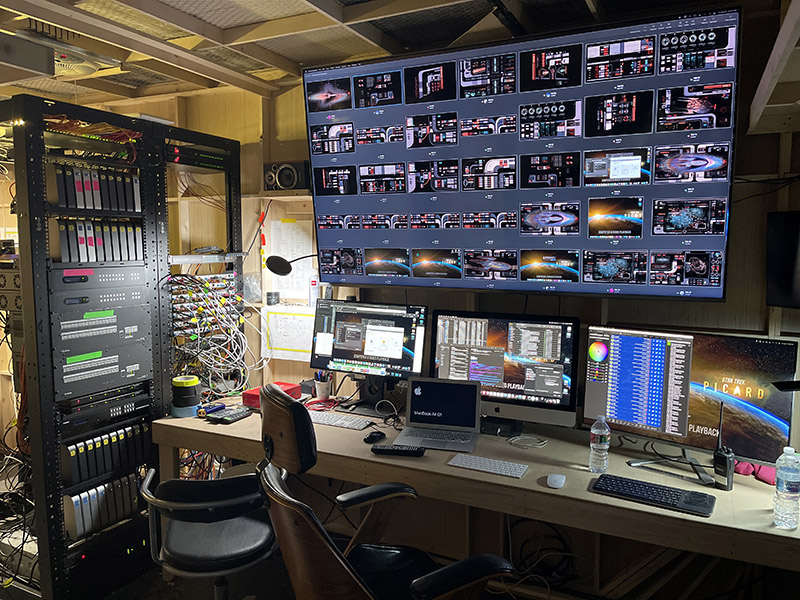
Marks leveraged the Epson Projector Management software for monitoring and controlling the networked projector fleet across the soundstage. “The software allowed us to remotely control the projectors—turning them on and off, monitoring, adjusting, and controlling the projectors from our playback control room,” says Marks. “It was especially useful on the set because we could instantly make changes, or black-out an individual or entire bank of projectors, if we needed to.” The command bridge set alone had 35 display feeds—each requiring an Apple Mac Mini for content. Images On Screen supplied the systems (including over 60 different Macs) that were used for playback and control on many of the futuristic and alien sets.
“We were able to bring a level of visual and creative expertise to the set that the production team didn’t expect—things that normally would have to be done in post-production,” concludes Marks. “This type of real-time adaptive effects really showed the value in projection and what it can bring to the screen. We couldn’t have pulled off these types of effects at the cost we did with any other display technology. I am proud of the solutions that Images On Screen and Epson brought to Picard.”
This article was written by Michael S. Eddy.