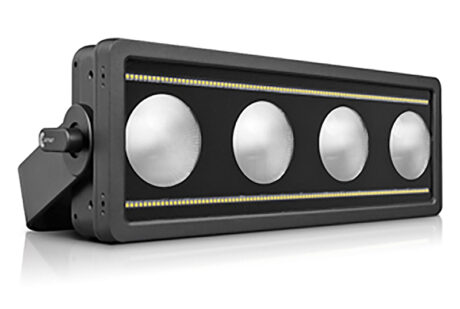
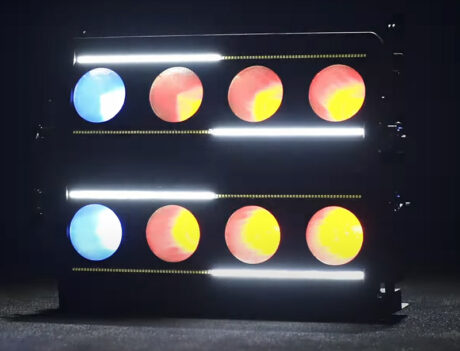
The Tambora Flash is a 20” LED blinder and strobe. It has four large round RGBWW LED cells across the middle of the fixture. There is a strip of linear white LEDs running the length of the fixture above and below the color cells. In essence it is a four light color changing blinder with a row of white strips framing it.
Set-Up – Part 1
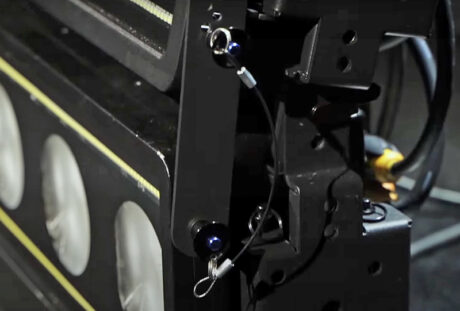
Physical set-up is simple. The unit is IP66 rated, it feels solid and well-constructed. It weighs about 23 lbs. and is easily handled by one person. Its bracket can take clamps for hanging or pivot to use as a floor stand.
One of the features that helps the Tambora Flash stand out from similar functioning products is a system that allows multiple units to attach in clusters, called “quick coupling’. They can be configured in horizontal and vertical arrays, with individual units still able to tilt independently.
The fixture has inputs and pass-thru for powerCON True 1, DMX, and Ethernet on its rear panel. The LCD Display and buttons to access its data configuration and test functions are clear and easily accessible. The display can be flipped if the fixture is hung upside down, which is nice. The Tambora Flash can be configured to receive DMX, Art-Net, RDM, and sACN.
Set-Up – Part 2
Which brings us to control. The Tambora Flash can be controlled through several mode options and “engine” configurations. The Basic Engine has five control modes. The simplest of the modes—Standard RGBW (16/20 DMX channels for 8-bit or 16-bit color control) allows control of the color changing LEDs together as one unit and the white LED strips as a single strobing unit.
The Shape RGBW mode is the most complex of the basic engine modes (34/42 channels). It engages a layer of control that allows the separate LED elements to be broken up into preset built in patterns. Macro effects with selection and speed allowing for a variety of looks but not true individual pixel control.
If you are interested in controlling the color cells individually the Pixel Engine must be enabled. This allows RGBW control of each of the cells (16 channels). Enabling the Strobe Engine allows the white strobe strips to be controlled in 16 sections (8 top, 8 bottom).
Unfortunately, this control interface did not prove to be intuitive on two levels. I spend most of my time as a programmer so putting that hat on it took me a few minutes to realize I had to patch each of the engines as individual fixture profiles to access full functionality of the unit. This is of course manageable, as I also know that I can rebuild a profile to combine the three engines into one multi-part fixture. It is mildly irritating but not prohibitive.
However, configuring the fixtures themselves may prove to be more daunting. If you want individual pixel control of the full unit, each of the engines must be set to a mode and addressed. Meaning the Basic Engine must have a mode, and a starting address—for example Mode: Shape RGBW 16 Bit (42 channels), DMX Start Address: 1. The Pixels Engine must be set to RGBW Mode (16 channels), DMX Start Address: 43 and the Strobe Engine set to Enable and set to DMX Address 59.
So, three modes and three DMX addresses must be correctly set in each fixture. Which could present some significant troubleshooting issues when dealing with a large quantity of these fixtures.
The Good News
Once I got the fixture set-up on both the fixture and console it performed admirably. The large LED cells are 100W each with RGB, Cool and Warm White control. As a blinder it can feel blinding with all LEDs on. Used individually the warm white emulates the feel of incandescent Molefays giving it an old school blinder feel. The colors are nice and rich.
When using both the Basic Engine Shapes and individual pixel engine control you can crossfade between two different running effects and colors creating a wide range of dynamic effects that would look incredible in large arrays of the fixtures.
The linear white strobe strips are impressively bright. They make a nice counterpoint to the color cells and can bring the appropriate pain we expect in modern LED strips. Built in strobe functions for both the color and white portions of the fixture are both good.
The fixture has variable fan settings if being used in a location where noise level is a consideration. In its default setting it increases and decreases based on unit output. Fan noise was noticeably increased when the fixture was outputting at high levels. There are modes that keep the fan noise down and throttle the light output. This is configurable both in the onboard fixture menu and via console.
The fixture also has five console controllable dimmer curves and red shift emulation. Console controlled PWM [Pulse Width Modulation] frequency and raw color gamma adjustment are good camera-friendly features.
Overall
After a somewhat steep learning curve on both ends of the control snake, I found the Tambora Flash to be a good blinder/strobe hybrid unit.
At a Glance:
Claypaky: Tambora Flash Static Hybrid Strobe/Blinder
PROS
- Rich colors
- Bright stroby bits
- Quick coupling cluster arrays
CONS
- Steep learning curve at console
- Complex mode setup at fixture
STATS
- Light Source: Four RBGWW LED with Reflector + Two Lines of White Strobe
- Output: 8,458 Lumens @ Full Color
- Input Range: 95-264V 50/60Hz
- Power Draw: 1,150VA @230Vac 50Hz.
- Strobe: Electronic Strobe @25 f/sec.
- Dimming: Electronic Linear Dimmer, 24-bit and Five Curves.
- Control: RDM, WebServer, Art-Net, sACN, and Kling-Net
- Connectors: Neutrik® powerCON® TRUE1 In/Out; Locking 5-pin XLR In/Thru; Ethernet RJ45 In/Out.
- IP Rating: IP66
- Weight: 23.15 lbs.
- Dimensions: 19.68” x 7.08” x 5.03”
MANUFACTURER: Claypaky
MORE INFO: www.claypaky.it/en/products/tambora-flash